Collaborating on Canva is crucial for marketing teams to create stunning visuals together. This article guides you through the simple steps to gain access to Canva and invite users, enabling smooth teamwork. Learn how to manage user permissions, send invitations, and boost your creative process efficiently.
Setting Up Your Canva Account for Team Collaboration
Setting up a Canva account for team use requires thoughtful steps to avoid confusion and maintain control. Start by signing up for Canva by providing necessary details such as email, name, and creating a password. Now, choose an appropriate Canva plan aligned with your team’s needs. Both Canva Pro and Canva for Teams offer provisions for team collaboration.
Next, create a team folder or workspace, it will serve as a central hub for all your designs and proofs. Navigate to the ‘Shared with me’ tab and click on ‘Create a team.’ Give your team a name, add descriptions, and invite members right away or later as per your plan.
Account roles and permissions play a significant role in managing team collaboration. They establish access levels and functionalities for team members. Canva allows for three types of roles: administrators, team members, and template designers. Administrators have complete control over the account, team members contribute and edit designs, while template designers can only create and edit templates.
You’ll be sharing invitations with team members in the next steps, so ensuring these foundations are in place is crucial for smooth collaboration. Ensuring the correct choice of plan and clearly defined roles and permissions will set the stage for a productive collaboration.
Inviting Users and Managing Invitations in Canva
Once you’ve set up your Canva account and your team workspace, the next step is inviting your team members or clients to join your team. Here’s a step-by-step guide to do that.
To invite users, navigate to your Canva home page, and click on the “Create a Team” option. Enter the emails of the people you want to add, click on the “Send invitations” button. An invitation will be sent via email through Canva’s interface.
Accepting Access
The invitees will get an email with a link. By clicking on this link, they will be directed to your Canva team or project where they will be prompted to create an account if they don’t have one, or sign in to their existing Canva account to accept your invitation.
Managing Your Team after Acceptance
Once your team members have accepted the invitation, you can manage their permissions. Go to “Team settings”, select the user, and choose the permissions you want to assign, such as viewer, editor, or administrator roles.
Resending Invitations and Removing Users
You can also resend invitations if someone didn’t get the email, or remove users from your team. Just find the user under team members and click on the “Resend” or “Remove” buttons, respectively.
By familiarizing yourself with these steps, you can efficiently manage your team or client collaborations on Canva, leading to more organized and seamless design workflows. In the following chapter, we will delve deeper into optimizing team collaborations and successfully managing your Canva projects.
Optimizing Collaboration on Canva for Marketing Teams
Now that you’ve learned how to invite users and manage invitations, it’s time to fully optimize your team’s collaboration on Canva. A powerful feature of Canva is the ability to organize designs into folders. This ensures that every team member can easily find and work on projects specific to their role or task.
With Canva’s comments and feedback features, team members can easily communicate, ensuring your designs meet their intended goals. Canva’s scheduling tools also allow your team to plan content releases ahead of time, ensuring a smooth, steady stream of marketing content.
Proper user access management is key to improving workflow efficiency. Assign specific roles to team members, like editor or viewer, to maintain control over who can edit designs and who can only view them. This practice keeps your projects on track and ensures only authorized individuals can make changes.
In essence, optimizing collaboration within your marketing team involves using Canva’s features effectively, maintaining clear communication, and managing user access rights properly. By doing these, you can create a seamless design process that’s efficient and productive, taking your marketing efforts to new heights.
Conclusions
By following these straightforward steps to set up your Canva account, invite users, and manage collaboration, marketing teams can create visual content more efficiently. Proper access control and organized teamwork ensure designs reflect your brand’s vision and help accelerate project delivery. Start inviting your team today to unlock Canva’s full collaborative potential.
Alternative Access with LinkMyAgency
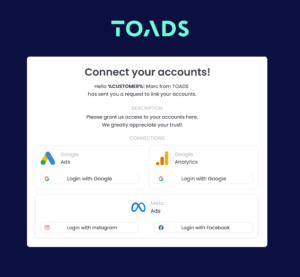
Another approach involves using LinkMyAgency to streamline the access process:
Send a Link: With LinkMyAgency, send a link to your client that allows them to easily grant you the necessary access without complex steps. No more frustration for either you explaining the steps, or your client not finding how to invite you.
Get Started with LinkMyAgency Sign up for a free 14-day trial in just a minute—no credit card required. Experience how LinkMyAgency can facilitate your agency operations, endorsed by industry giants like Meta, Google, and TikTok.