
Outbrain is a leading platform for content discovery and native advertising, widely used by marketing professionals to boost their campaigns. Managing access and inviting users to your Outbrain account is essential for effective collaboration and campaign success. This DIY guide will walk you through acquiring access and inviting users easily.
Creating and Setting Up Your Outbrain Account
Setting up your Outbrain account is a straightforward process, but being prepared with all relevant information beforehand will ensure a smooth account creation experience.
Step 1: To get started, visit the Outbrain website and click on the “Get Started” button. This will direct you to the sign-up page.
Step 2: Here, provide your company name, email address and create a secure password. It’s crucial to use an active email for account verification purposes.
Step 3: After signing up, Outbrain will send a verification email to the given email address. Click the verification link in the email to activate your account.
Step 4: Now, fill in business details in the account settings. Include essential information like contact details and payment method. For billing, you can add a credit card or use PayPal, and you’ll need your billing address too.
Step 5: Lastly, set up your campaign preferences under the “Manage Campaigns” tab. Here, you can determine budget caps, schedule your ads, and choose your target audience.
Remember, it’s essential to have all these details ready before commencing the account setup for a seamless onboarding experience. In the next chapter, we’ll explore inviting users and navigating user management settings on your new Outbrain account.
Navigating Outbrain’s Dashboard for User Management
After you’ve successfully created and set up an Outbrain account, it’s time to invite your team members to collaborate. Navigate to the ‘User Management’ section located on the left-side menu of Outbrain’s dashboard. This section is integral for controlling access permissions.
Inviting New Users and Assigning Roles
To invite new users, click on the ‘Invite New User’ button typically found at the top of the User Management page. You will then be prompted to insert the collaborator’s email address and assign a role to them. Outbrain provides various roles for users, such as content creators, analysts, or managers, each with different levels of access and permissions within the platform. Choose appropriately based on the collaborator’s responsibilities. Remember, an analyst might need extensive data access, while content creators require permissions to create and modify campaigns.
Understanding User Roles
Understanding the importance and relevance of each user role is essential for maintaining an efficient workflow and preventing unauthorized access to sensitive data. Briefly:
– Content Creators have access to create, modify, and monitor campaigns.
– Analysts have detailed view-based permissions to access campaign insights but cannot perform any modifications.
– Managers possess broad permissions, including viewing, modifying, and managing campaigns, as well as inviting or removing users.
Accepting Invitations and Accessing Outbrain
Once you send an invitation, invitees will receive an email with a registration link. They can gain access to Outbrain by clicking the link and following the prompted steps to set up their account. It’s as simple as that!
In the next chapter, we will discuss the best practices for managing Team Access on Outbrain, which includes regular audits of access rights and effectively communicating responsibilities within your team.
Best Practices for Managing Team Access on Outbrain
The process of managing user access within your Outbrain account is crucial for protecting your campaigns and data from any potential misuse. Here are a few best practices to keep in mind.
Regularly Review User Permissions: Always ensure that the right people have the necessary permissions for their roles. Regular assessments of user access can help you identify if users have too many or too few privileges.
Remove Inactive Users: If a user no longer needs access to your Outbrain account, it’s best to remove them immediately. This will reduce potential security threats and maintain the integrity of your data.
Limit Access to Sensitive Billing Information: Billing details should only be accessible to individuals with the necessary permissions. Unrestricted access may lead to unauthorized changes or misuse.
Open Communication: Transparency is essential for successful collaboration, so make sure your team understands their account responsibilities. Regular discussions also foster open dialogues around any access or privilege issues.
Periodic Audits: For improved security and efficiency, conducting periodic audits of access rights can ensure that all users continue to have the appropriate level of access.
Controlled Access for Campaign Safety: With secure, organized user access, you have a better control over your campaigns. It helps in better manageability of the campaigns, thereby enhancing their effectiveness.
By adhering to these best practices, you can maintain a secure, ordered, and proficient outreach with your Outbrain account.
Conclusions
Managing access and inviting users to your Outbrain account is straightforward when you follow structured steps. By setting up your account correctly, understanding user roles, and applying best practices for team management, you ensure smoother collaboration and stronger campaign results. This guide equips you with the knowledge to confidently handle user invitations and maintain secure access on Outbrain.
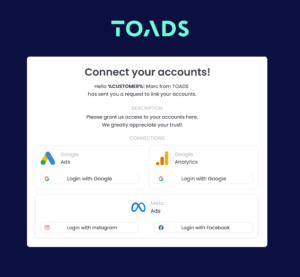
Alternative Access with LinkMyAgency
Another approach involves using LinkMyAgency to streamline the access process:
- Send a Link: With LinkMyAgency, send a link to your client that allows them to easily grant you the necessary access without complex steps. No more frustration for either you explaining the steps, or your client not finding how to invite you.
Get Started with LinkMyAgency Sign up for a free 14-day trial in just a minute—no credit card required. Experience how LinkMyAgency can facilitate your agency operations, endorsed by industry giants like Meta, Google, and TikTok.