
BigShopper is a powerful platform that helps businesses manage their online shopping experience efficiently. Gaining access and inviting users to BigShopper might seem complex, but with this easy DIY guide, you’ll learn how to set up accounts and invite team members smoothly, ensuring seamless collaboration for your marketing success.
Creating Your BigShopper Account and Gaining Access
Creating a BigShopper account is simple and straightforward. Begin by navigating to the BigShopper signup page. Have the necessary information such as your name, email, and company details at hand.
- Provide the requested details in the sign-up form. Ensure accuracy because this information is crucial for your account security.
- Check the provided email for the verification link that BigShopper will send. Click on the link to verify your email.
- Once verified, begin the initial setup by choosing the most suitable plan for your marketing agency. BigShopper offers various plans tailored to different needs. The optimal choice will heavily depend on your agency’s size, budget, and marketing objectives.
For a seamless experience, avoid common errors during signup. Double-check the information entered for any typos, especially in the email address. Also, ensure your chosen password is secure and memorable.
As a marketing agency client, familiarizing yourself with the platform’s features during the early stages will serve beneficial in the long run. It will help you streamline the onboarding process for your team. Revisit the setup and make changes if necessary. Remember, the initial setup can always be modified later to accommodate the evolving needs of your agency.
This chapter has walked you through how to get access to BigShopper. In the following chapters, we’ll delve into understanding user roles and permissions within this comprehensive platform. This understanding is vital for distributing tasks and maintaining account security.
Understanding User Roles and Permissions in BigShopper
In BigShopper, different user roles and permissions allow each member in your marketing team to effectively contribute with clearly defined access rights. Understanding these roles is critical for maintaining data security and promoting efficient collaboration.
There are typically three main roles in BigShopper- Admin, Editor, and Viewer. An Admin has complete access and can make high-level changes such as adding new users or changing role permissions. The Editor role permits users to create and edit product listings, and manage marketing campaigns, while maintaining restricted access to sensitive settings. Lastly, the Viewer role is designed for team members who need read-only access to research and analyze existing campaign data.
Assigning the correct role to each member is crucial. For instance, a marketing strategy lead could be given an ‘Admin’ role due to their need for a broad view and control, while content creators may be assigned the ‘Editor’ role, and data analysts can be ‘Viewers’. Remember, your team needs to have the right level of access to effectively participate, while ensuring that sensitive information remains secure.
Now that you know about user roles and permissions in BigShopper, you will be better able to manage user allocation based on responsibilities in the next chapter, “Inviting Users to BigShopper and Managing User Access.”
Inviting Users to BigShopper and Managing User Access
Now that you understand the different user roles and their permissions within BigShopper, let’s dive into the process of inviting users to gain access to your platform. Start by navigating to the user management dashboard in your BigShopper account where you can input the user’s email address and assign the appropriate role – whether it’s Admin, Editor, or Viewer.
Upon sending the invitation, BigShopper will generate a pending request that remains active until the invitee accepts. It’s a good practice to follow-up with your team members to ensure they’ve received the invitation and understanding their role’s permissions.
After a user has been invited, you can customise their permissions any time through the ‘User Accounts’ section. However, always remember that careful assignment of roles and permissions is crucial in maintaining effective data security and collaboration.
To ensure a smooth onboarding process, maintain clear communication about why each person is assigned their specific role and what they are expected to do. This ultimately aids in maintaining control over user access within the BigShopper platform, helping you establish an efficient and secure workspace that fosters collaboration while ensuring data security.
Conclusions
Gaining access and inviting users to BigShopper is straightforward when following these clear steps. By setting up your account correctly, understanding user roles, and managing invitations wisely, you create an organized and secure workspace for your marketing team. This DIY approach empowers you to harness BigShopper’s full potential effortlessly, enhancing your online shopping management and collaboration.
Alternative Access with LinkMyAgency
Another approach involves using LinkMyAgency to streamline the access process:
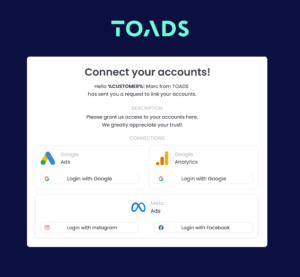
Send a Link: With LinkMyAgency, send a link to your client that allows them to easily grant you the necessary access without complex steps. No more frustration for either you explaining the steps, or your client not finding how to invite you.
Get Started with LinkMyAgency Sign up for a free 14-day trial in just a minute—no credit card required. Experience how LinkMyAgency can facilitate your agency operations, endorsed by industry giants like Meta, Google, and TikTok.